
Article Index
Use a Custom Logo Image
In order to upload your logo image file, first make sure you followed the steps outlined in Create an Onpub Website. Specifically your site will need to have its Images Directory and Images URL fields set correctly in order for image uploads to work correctly.
Once you've verified that your Onpub website is setup correctly, follow the steps below to upload and apply your logo image file to your website:
-
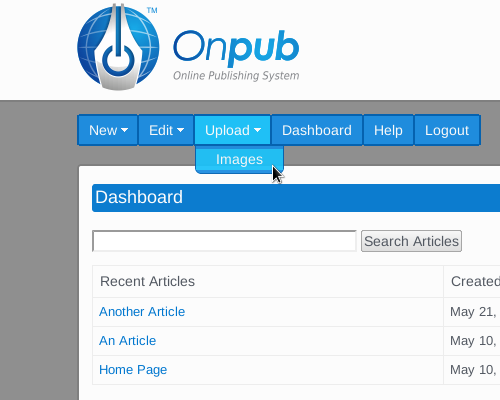
In the Onpub Management Interface, mouse-over the Upload menu and click Images
-
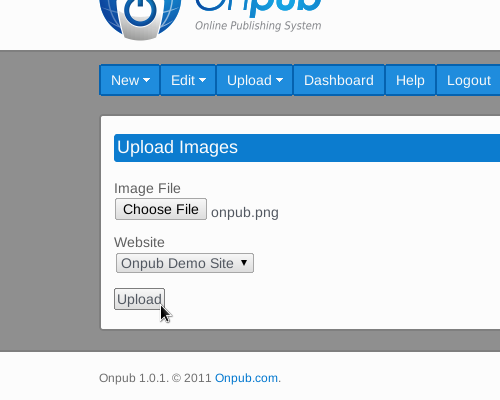
Click the Browse/Choose File button, select your logo image file and click Upload
-
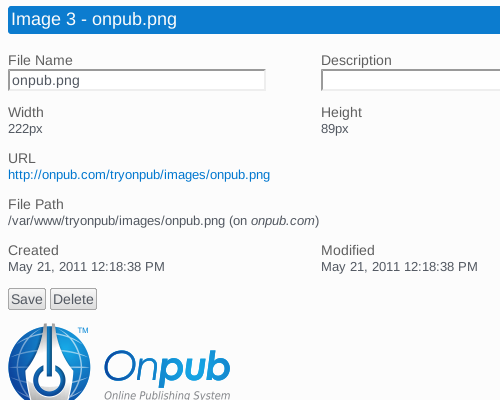
If the upload was successful, you should see the Onpub Image Editor, pictured below:
-
In the Onpub Image Editor screen click the link under the Onpub Website heading. This will bring you to the Website Editor screen for your site.
-
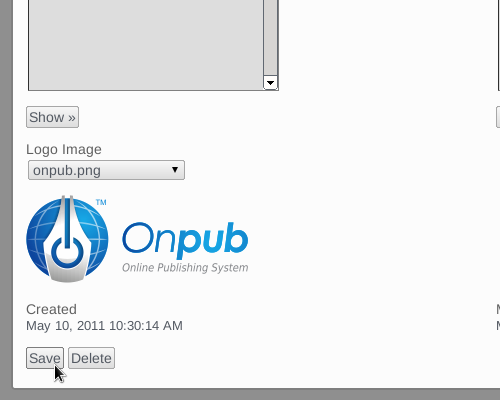
Select your logo image file name from the Logo Image drop-down list and click Save:
That's all there is to it!
From now on the frontend will automatically display your custom logo image instead of just your website name in plain text. You can upload and choose a new logo image at any time you'd like and the frontend will display the new image the next time your site is reloaded in your web browser.
Customize the Frontend Style Sheets
The design of the website frontend included with Onpub is easy to customize due to its use of standard CSS code.
The Onpub frontend style sheets and layout are built using the YUI 3 CSS framework. See the following links for more information:
The included frontend/css/onpub-menu.css file contains the CSS code that controls the look and feel of the horizontal drop-down navigation menu. The frontend/css/onpub.css file contains the styles that are used throughout the rest of the frontend layout.
When the onpub.css and onpub-menu.css files are copied to your onpub/local/ directory, your CSS file edits in the onpub/local/ directory will automatically override the code in the default style sheets located in the onpub/frontend/css/ directory.
In order to customize the default CSS included with Onpub, perform the following steps in your Onpub installation directory:
-
Copy the onpub.css and onpub-menu.css files from the onpub/frontend/css/ directory to the onpub/local/ directory.
-
Open onpub/local/onpub.css and onpub/local/onpub-menu.css in the text editor of your choice and make the desired changes to any of the included CSS classes.
- Reload your Onpub website in your web browser and your style changes will be loaded automatically.
Be sure to always work on your custom CSS changes in your onpub/local/ directory so that when you upgrade to newer versions of Onpub your style changes are preserved. When upgrading to newer versions of Onpub, files in the onpub/local/ directory will never be overwritten.
By customizing the included CSS files, you can easily create your own personalized, custom Onpub frontend layouts and designs.
If you are not familiar with how CSS works, W3Schools is an excellent place to start learning.
See the Onpub Demo Site for an example of an Onpub-powered site with a custom frontend design.